
Thousands of years ago, the Bible described what has been translated as a “defiling mould” or “leprosy” of a house, with affected materials removed from the building when contamination was found. Thousands of years later, we seem to have gone backwards, with mould somehow becoming regarded as a cleaning and redecoration problem that can be dealt with by spraying it, bleaching it or simply making the visible staining disappear.
This is why, when we find mould in a property, our first question is why it is growing there in the first place. To answer that properly we need to understand the building as a whole, which is why a mould survey can be very different from a basic damp survey that may be more targeted towards one particular wall or affected area – and often ends in the wrong diagnosis designed to sell unnecessary and ineffective products such as chemical injections.
When problems occur, investing in an independent building pathology survey is a vital step in achieving a healthy home ecology. Ensuring the surveyor is skilled and independent is important – you are buying the truth – not products the surveyor conveniently has in the van.
The survey starts before we arrive
Our investigation begins before we even leave the office. Before attending we research the age and construction of the property, its history and any alterations that may have taken place over the years. We also look at the local environment, including flood history and water tables where relevant, because understanding what is happening around and beneath a building can be just as important as understanding what is happening inside it.We are particularly interested in changes to the original building because these can alter the way it manages water, heat and air.
Depending on the property we may be looking for:
- Extensions and additions
- Loft or basement conversions
- Changes to the roof
- Replacement windows and doors
- Render or external wall coverings
- Changes to insulation
- Altered external ground levels
- Changes to drainage
- Other significant alterations to the original construction
A publicly available Energy Performance Certificate (EPC) can also provide useful information about heating, insulation and the thermal characteristics of the property and forms another part of the overall picture.
After We Arrive
When we arrive we start by looking at the street and surrounding buildings, particularly where there are neighbouring properties of the same age and construction. They can give us a useful picture of what the property originally looked like and make it much easier to identify what has subsequently been altered, removed or added. Sometimes a neighbouring property provides an important clue before we have even walked through the front door.
The external inspection
The external inspection is a substantial part of the survey because understanding moisture inside a building starts with understanding how that building is managing water outside.
We inspect the building systematically, looking at where water is being collected, directed and discharged and identifying areas where the building fabric may be vulnerable to water penetration. Depending on the type of property, this can include:
- Roof coverings, chimneys and flashings
- Gutters and downpipes
- Drainage and gullies
- External ground levels
- Brickwork and pointing
- Render and other wall coverings
- Windows, doors and sills
- Joints and seals
- Penetrations through the building
- External timber
- Extensions and later additions
We also look carefully at what has been added to the building over the years. External pipework and cables, solar installations, satellite dishes, vents, canopies and other fixtures can all influence the way water moves around the outside of a building.
General condition matters too. Cracks or movement, deteriorating timber, pointing and render, gutters, joints, seals and ordinary wear and tear all help us build a picture of the condition of the property and the maintenance it may need. As building pathologists, we understand the way a building is constructed, and therefore what external defects can and will impact the inside, and those that won’t due to a cavity in between, for example.
Sometimes there is one obvious defect, but quite often the answer lies in several smaller problems which, when considered together, explain what we later find inside the property. By understanding the outside first, the readings and observations we make inside have much more context. A good surveyor is not led by obvious defects and will want to understand the whole pathology of the building before making any conclusions.
What we can’t see from the ground – using binoculars – we use a drone camera to provide close-ups of the roof, chimney pots and rainwater goods. These images are helpful for identifying issues such as poor lead flashing defects and full gutters that require clearing.
Any known health issues or vulnerabilities within the household are vital, as understanding who occupies the property and how their health has been impacted helps inform how the investigation and any subsequent remediation should be approached. We have taken the time to understand how the lived environment can impact people’s health and wellbeing and how one person may be able to smell warning signs and another can’t – that’s all about how sensitized the person is to the hazard and how their olfactory nerve is informing the brain about the risk. It’s fascinating.
Psychrometric readings
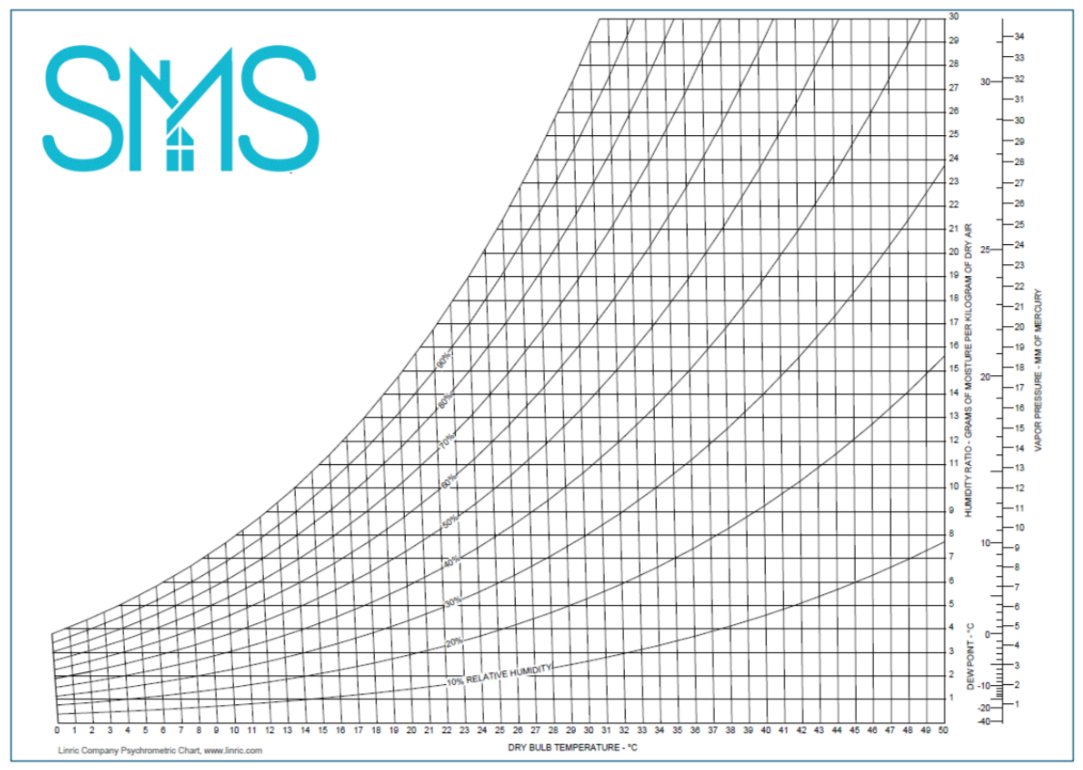
Once we have started to understand the building itself, psychrometric readings help us understand what is happening within its indoor environment.
The readings we use include:
- Air temperature – usually measured in °C
- Relative humidity – measured in %
- Dew point – usually measured in °C
- Surface temperature – usually measured in °C
- Humidity ratio – measured in g/kg
- Vapour pressure – where required, measured in kPa
Temperature is the temperature of the air in the space being assessed, whereas relative humidity (RH) tells us how much water vapour is present compared with the maximum amount the air could hold at that particular temperature. This is why relative humidity is considered alongside temperature, as warming the same air changes its relative humidity.
Dew point is the temperature to which the air would need to cool to reach saturation. Comparing this with surface temperatures helps us understand where condensation may occur and, importantly, where surface conditions may become favourable for mould growth before visible condensation develops.
Surface-temperature measurements allow us to compare walls and other materials with the conditions in the surrounding air and identify colder areas where surface humidity may become elevated.
Humidity ratio, usually expressed as g/kg, tells us the mass of water vapour present relative to the mass of dry air. This is particularly useful during a mould survey because it allows us to compare the moisture load inside the property with the conditions outside and between different areas of the building.
Vapour pressure (VP), usually expressed in kilopascals (kPa), tells us about the pressure exerted by the water vapour present in the air. Like humidity ratio, it gives us a way of looking at the actual moisture present rather than relying on relative humidity alone. Comparing vapour pressure between different areas of a building, and with outside conditions, can help us understand how moisture is moving and where there may be an additional source of moisture within the property.
Why do we take readings outside?
An external environmental reading is extremely important because it provides our reference point. We can then compare this with readings taken in individual rooms and, where possible and appropriate, within lofts, subfloors and other spaces.
Comparing the humidity ratio inside and outside helps us identify where the internal moisture load is elevated and directs our investigation towards possible sources. This may include moisture being generated inside the property, ventilation, wet building materials, loft or subfloor conditions, leaks and other sources of water.
The readings are then considered alongside the weather, occupancy, heating, ventilation, construction and everything we find during the physical inspection.
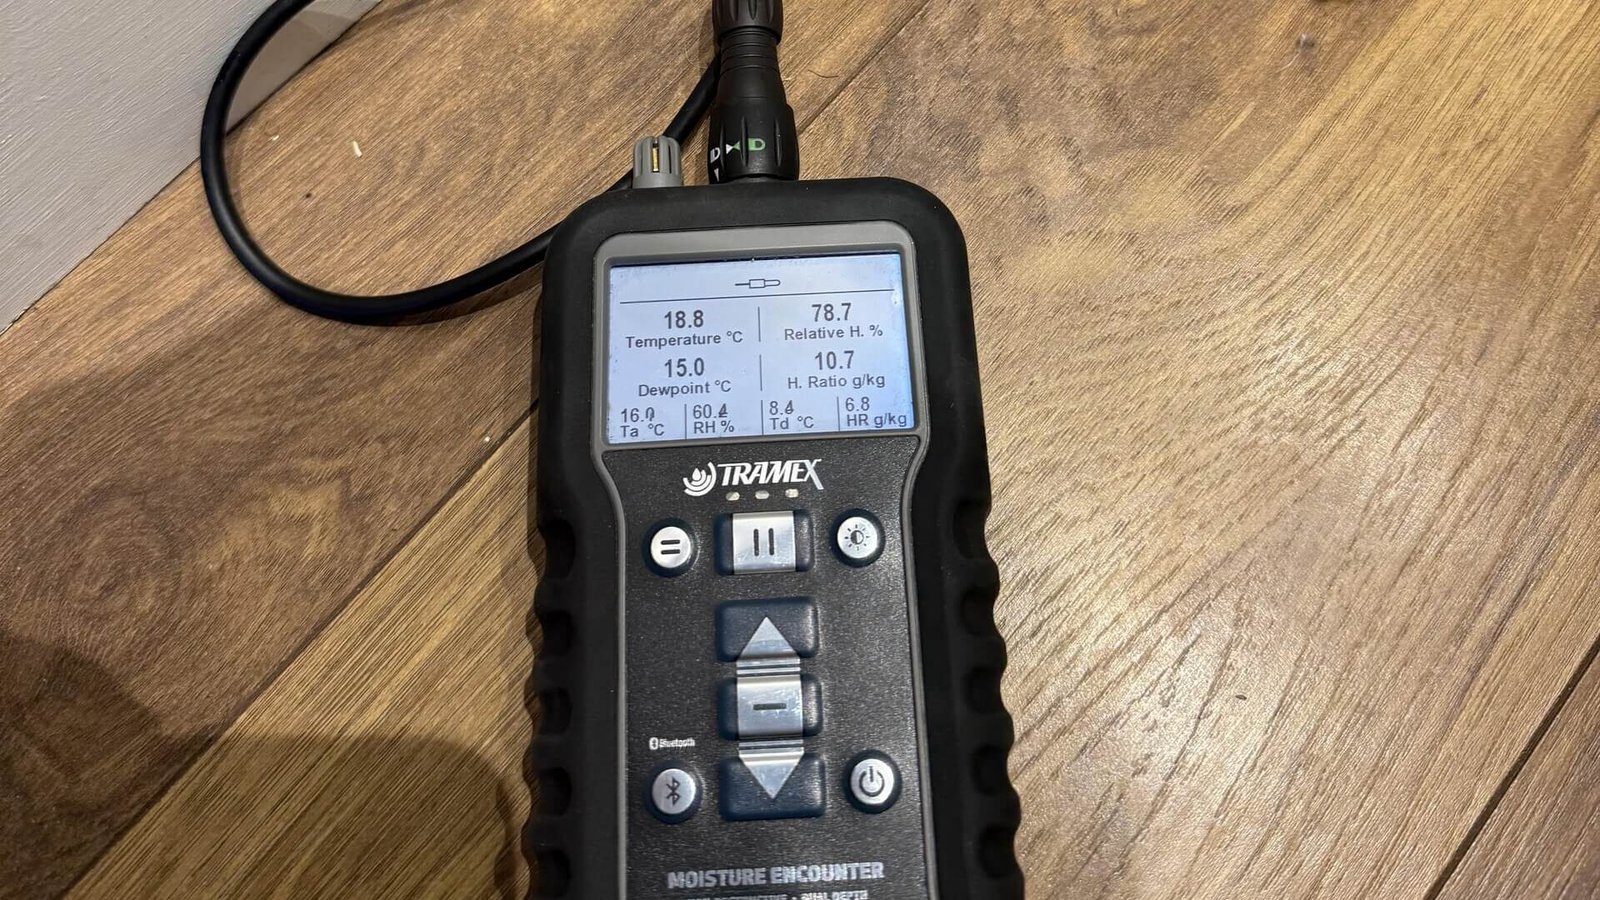
Each instrument needs sufficient time to acclimatise to the environment before a reading is recorded. Our instruments are calibrated regularly with certificates of calibration being produced each time. This is important as instruments can drift and that would skew findings. For most of the readings above, we use the Tramex MEX5 and the Protimeter MMS3. Having two different instruments side by side is a helpful reference and can help us to spot instrument anomalies.
Thermal imaging and surface temperatures
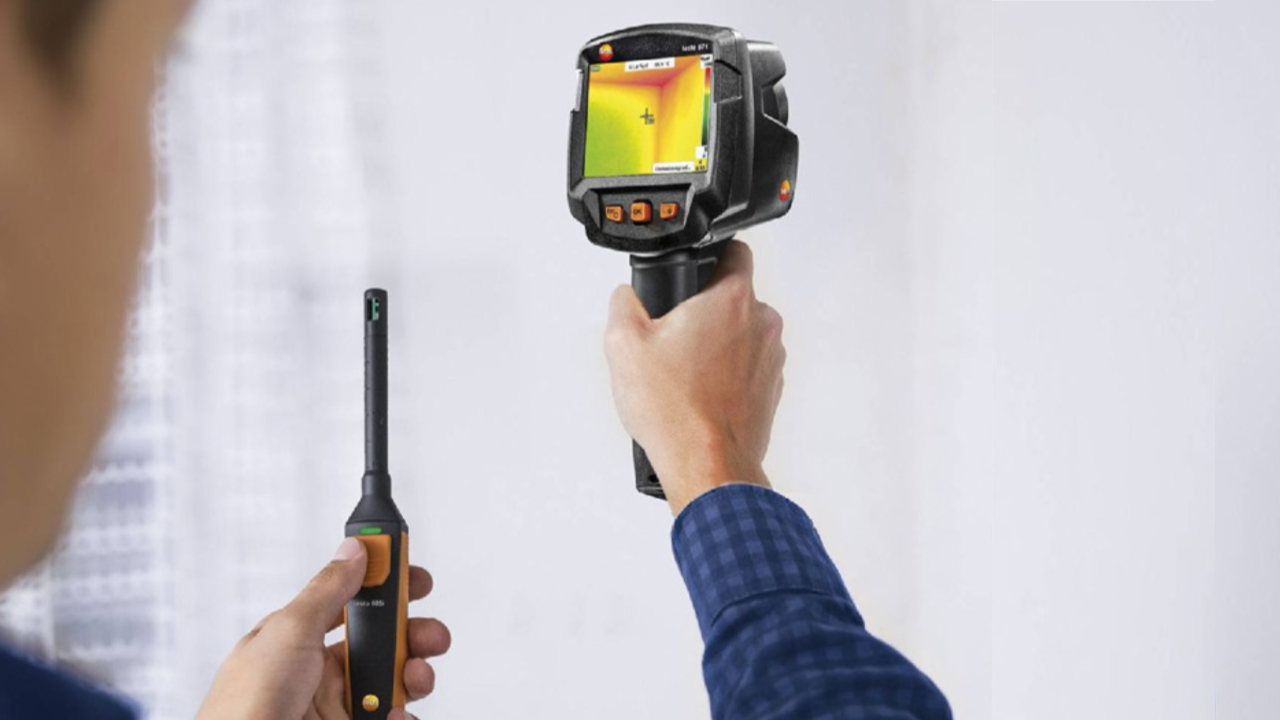
By this point the readings are starting to tell us more about how the property is behaving. A thermal camera is another very useful tool and we like to use the Testo 872s when carrying out surveys.
Thermal imaging allows us to see differences in surface temperature across an area. These patterns can highlight cold surfaces, thermal anomalies and areas that warrant closer investigation.
Cold surfaces and thermal bridges can experience much higher surface relative humidity than the air in the middle of a room and, if a surface falls below dew point, condensation can occur. Understanding these temperature differences can therefore help explain why mould is repeatedly developing in a particular location.
Another instrument we use is the Bosch GIS 1000c thermodetector, which allows us to quickly and effectively compare surface temperatures with environmental conditions. The Testo mould probe kit, using the 605i and 805i, combines an infrared thermometer with a thermohygrometer and links to a smartphone app to help identify surfaces where conditions may present an increased mould risk.
Looking for hidden problems
With certain meters, including the Tramex MEX5, relative humidity probes can also be used to investigate accessible subfloors, behind dry lining and within other voids.
These measurements allow us to compare the conditions within concealed spaces with the rest of the property and can help direct further investigation towards areas where moisture damage or hidden microbial growth may be present.
Experience is particularly important here because understanding where hidden mould is more likely to occur, and recognising the building and environmental indicators associated with it, helps us decide where further investigation is justified. Environmental sampling can also add useful information in some circumstances.
The internal inspection
The internal inspection continues room by room, although we never look at each room in isolation. We are constantly comparing what we find inside with what we have already learned from our research, the external inspection and the environmental readings.
Within each area we are looking at things such as:
- Furniture layout
- Building defects
- Heating provision, effectiveness and how it is being used
- Signs of damp or water damage
- Insulation and cold surfaces
- Mechanical ventilation
- Background and passive ventilation
- Air movement
- Door undercuts and transfer air
- Occupancy and how the space is being used
A stain or area of mould on an internal wall becomes much more informative when we understand what is happening outside that wall, what is behind, above and below it, and how the air within the room is behaving.
Ventilation
Mechanical ventilation forms an important part of the assessment and we prefer to use the Testo 417 vane anemometer and funnel set to measure the extraction rate being achieved.
Where extraction performance requires further investigation, we can look at the duct diameter and length, bends, restrictions, how the ducting has been installed and where it eventually terminates outside the building. Inspecting the external termination – the type of external grill, for example, is also useful as some reduce the effectiveness of the ventilation, such as gravity grills. Seeing cobwebs sealing a grill shut on the outside confirms inactivity either through non-use or the fan being wholly ineffective despite being on.
Looking at the existing ventilation in this level of detail also helps us decide whether improvements are needed and which ventilation solution is most appropriate for the property, its construction, occupancy and moisture load. We would always recommend automatic ventilation that doesn’t require human intervention to avoid human error.
Environmental Sampling
Environmental sampling is another option when carrying out a mould survey and something we will cover in more detail in our next blog.
Sampling is most useful when it is selected to answer a defined question. Depending on the circumstances, air, surface or dust sampling can help us investigate suspected concealed contamination, provide additional information about the indoor environment and help inform remediation or post-remediation verification.
The results then become another part of the overall evidence, alongside the building inspection, moisture investigation and environmental measurements.
Moisture Readings and Moisture Mapping
Moisture readings and moisture mapping of internal surfaces and materials can help identify areas that require further investigation. We use different instruments depending on what we are looking at, including:
- Tramex MEX5
- Tramex CMEX5 concrete meter
- DeFelsko PosiTest CMM concrete meter
- Protimeter ReachMaster Pro
- Protimeter MMS3
Understanding the correct use of a moisture meter, what it measures and how the reading should be interpreted is extremely important. Different instruments and modes use different measurement principles, with some providing comparative or reference readings and others being designed for particular materials.
The construction and material being tested therefore form part of the interpretation, with moisture readings considered alongside the visual inspection, environmental conditions and the other evidence gathered during the survey.
All relevant findings, including environmental readings, should be photographed and recorded for use in the report.
Considering the evidence together
Once the property inspection has been completed, we return to the office and analyse everything we have collected. This includes our original research, occupant sensitivities and vulnerabilities and their lived experiences at the property, what we observed around the street and outside the building, the internal inspection, environmental and moisture readings, thermal images, ventilation measurements, photographs and any sampling results.
Bringing all of this information together allows us to determine the likely cause, or combination of contributing factors, that has allowed mould to become established within that particular property. Quite often several things are interacting, such as a building defect alongside ventilation performance, a leak affecting colder materials, or a number of external maintenance issues combined with an increased internal moisture load.
Once we understand how the building is behaving, we can develop appropriate recommendations and a scope of works that addresses both the conditions allowing mould to grow and the contamination already present.
Removing the mould
The objective of mould remediation is physical removal of contamination alongside correction of the moisture conditions that allowed it to develop. This means dealing with the source of the problem and removing contaminated materials and settled fungal contamination from the indoor environment.
Our recommendations follow the principles of ANSI/IICRC S520 and the guidance of the UK Centre for Mould Safety, with the emphasis on source correction, physical removal and leaving the indoor environment appropriately remediated.
A recap – what you can expect
- Desktop research into the property, its construction, history and alterations
- Relevant research into local flood history, water tables and surrounding conditions
- Observation of the street and comparable properties
- A detailed external inspection to understand how the building is managing water
- Identification of defects, deterioration and maintenance requirements
- Psychrometric readings outside and throughout the property
- A full internal inspection and investigation of lofts, subfloors and accessible voids where appropriate
- Thermal imaging where useful
- Dew-point and surface-temperature analysis
- Moisture testing and mapping
- Heating and insulation assessment
- Ventilation and airflow assessment
- Mechanical extraction testing
- Environmental sampling where appropriate
- Identification of the likely moisture source or sources
- Recommendations to correct the conditions allowing mould to grow and how to improve the building’s pathology
- Recommendations for the safe physical removal of existing mould contamination
A full written report should then bring all of this evidence together, explain the findings clearly and set out what needs to happen next. We also like to schedule a call after issuing our reports so we can talk through each item and make sure our clients understand what we have found and why we have made our recommendations.
With all of the above in mind, it is worth considering the time and expertise required to carry out this level of investigation properly when comparing different types and prices of mould survey.
Choosing a mould surveyor
When choosing somebody to investigate a mould problem, we would recommend looking for evidence of appropriate training, experience and competence across mould, moisture, ventilation and buildings.
A good survey should demonstrate:
- A whole-building approach rather than focusing only on the visible mould
- Appropriate investigation of moisture sources
- An understanding of the building’s construction and alterations
- Correct use and interpretation of environmental and moisture measurements
- Assessment of ventilation and airflow
- Appropriate use of thermal imaging
- Sampling where it adds value to the investigation
- Clear identification of the likely causes and contributing factors
- A practical scope of works addressing both moisture and contamination
- Clear reporting that explains how the evidence has led to the recommendations
A competent mould surveyor should be able to explain what they have found, what they have measured, what those measurements mean and how the different pieces of evidence have led them to their conclusions.
The equipment is important, but it is the ability to understand the building, the water and the indoor environment together that ultimately allows us to work out why the mould is there and what needs to happen to prevent it returning.
Author: Carl Reid
Director Surveyor and Mould Removal Specialist
Carl is one of the directors of Swift Maintenance Solutions Ltd and a highly trained mould and damp expert based in Wembley, North London. He is passionate to continually learn and teach about clean air, keeping his readers, and their families safe in their homes and workplaces.